Whether you're new to the world of sport fishing or an old pro who's simply never seen the need for fish-finding technology until now, learning to read a fish finder is a highly attainable skill that will up your fishing game exponentially. Standard or state-of-the-art, a fish finder reveals the underwater world beneath your boat's hull in ways that fishers of previous generations could only have imagined in their wildest dreams!
Interpreting the readings on a fish finder isn't hard, but like any technical skill, it does require some knowledge and practice. Below, we've shared an overview of how fish finders work, provided information on the various types available on the market today, and offered some practical guidance and tips that will have you identifying and landing fish in no time!
Ready for a crash course in fish finding? So are we! Let's get our feet wet:
From the name fish finder, you'd be forgiven for thinking that these devices only zero in on fish. That, however, is not the case. In reality, fish finder readings provide a snapshot of the entire underwater environment including topography, bottom structure, submerged structures, and more. Of course, as fishers, fish are primarily what we're after, and fish finders do also indicate their presence. But, as we'll see below, taking the time to read and interpret the underwater environment is also a core component of using your fish finder to its maximum benefit.
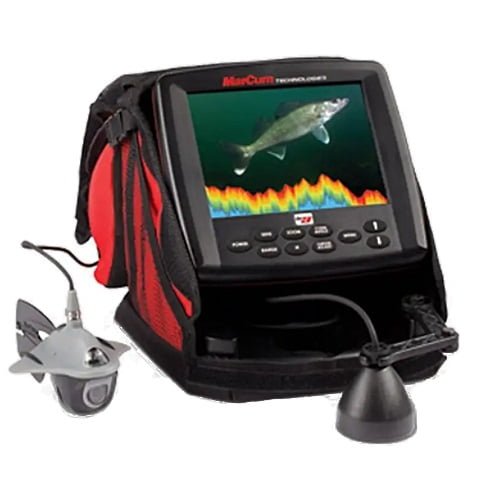
Fish finders have three main components: A transducer, a processor, and a display screen.
The transducer gets mounted on the hull of your boat. It sends and receives sonar pulses underwater, which are transformed into digital signals by the processor (essentially a small computer).
The screen displays these digital signals in an easy-to-interpret format and also provides an interface where you can change various settings, such as your fish finder's sensitivity, range, and frequency.
Not sure exactly what sonar is? Here are the basics:
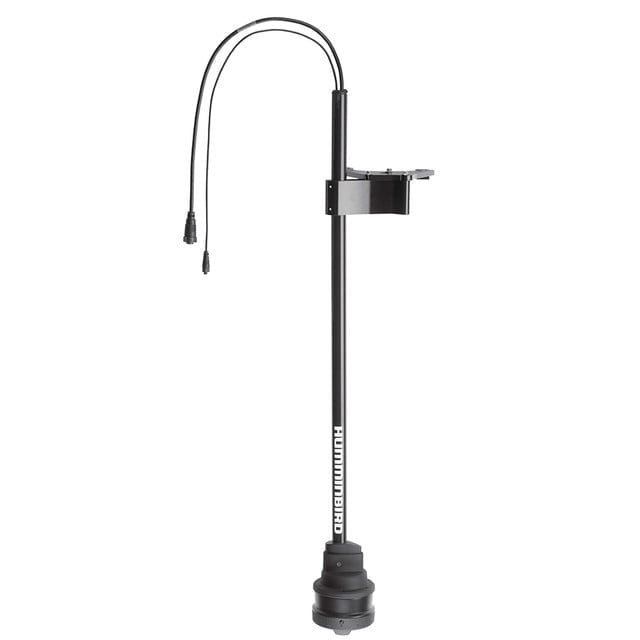
When setting up a fish finder on your boat, you're going to want to consider the optimal location for both the display screen (onboard) and the transducer (below board).
For the display screen, keep convenience and safety top of mind. Consider where you'll sit when driving the boat as well as when fishing and ensure that your fish finder won't be exposed to unnecessary damage or wear and tear.
In terms of the transducer, follow the manufacturer's mounting instructions to ensure that it is fully submerged and at the best possible angle for maximizing sound wave coverage.
When setting up your fish finder for the first time, there will likely be a calibration process to perform. This won't usually take long and, once again, should be undertaken according to the manufacturer's instructions.
Once you've properly mounted and calibrated your fish finder, it's time to get out on the water. You enthusiastically turn on your new electronic investment only to be confronted by an onslaught of numbers, colors, and shapes scrolling across your screen. Don't panic! Let's master the basics together.
Note: The information in this section pertains to traditional 2D sonar fish finders. Information about more advanced sonar technologies can be found under the heading Advanced Fish Finder Technologies below.
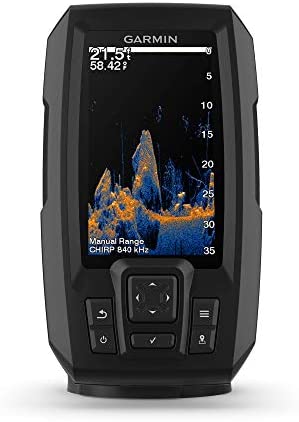
These types of metrics are pretty straightforward. While every fish finder is a little different, they will usually remain stationary in a corner of your display screen and will update automatically as conditions change.
Fishing is all about understanding fish behavior, and knowing the depth and temperature of the water you're in can help you broadly locate the ideal environment for the species of fish you're after. It's also helpful to keep an eye on water depth and the speed at which you're traveling for navigational purposes as well as when trolling.
The color palettes of different fish finders may vary, but the relationship between color and echo return strength always remains the same: Dense or hard objects will return a stronger signal and be displayed as bolder, darker colors (often reds), while more porous or softer objects will return a weaker signal and be displayed as lighter colors (often greens and blues).
It follows, therefore, that the bottom structure will typically represent the brightest area of your screen. A rocky bottom may show up as a swath of solid red, but if there's mud or plant matter on top of it, that may show up as a less defined strip of yellow or green. Reefs and shelves will also show up as bright areas on your screen, as will submerged objects and, of course, fish.
Worth noting is that you may also see a band of intense color at the very top of your screen, which usually represents surface clutter—the chaotic bouncing around of sonar signals off of bubbles, currents, debris, and more. You can simply ignore this type of inaccurate surface reading (unless you can actually visually see something solid floating in the water around your boat).
2D fish finders scroll from right to left, with the most recent information at the right-hand side of the screen and the oldest information disappearing off the left. This can take a little getting used to since, as English speakers, we're much more accustomed to interpreting data left to right.
If you're stationary, you'll get a fairly stable image across the screen because the only element changing in the underwater environment should be the fish. If, however, you're on the move at a slow or moderate speed, you'll witness constant changes as your screen registers the details of the underwater topography you're passing by.
Also, bear in mind that your fish finder will keep scrolling even if you're not moving. Therefore, don't be fooled into thinking that a single fish that appears multiple times across your screen is actually multiple fish. Do, however, pay attention to the changing position of that fish as your fish finder tracks it at various moments in time.
There are two primary ways that fish may show up on your 2D sonar fish finder: As small icons of fish or as arched lines. Depending on your fish finder, you may be able to switch between these two modes. Let's look at the advantages and disadvantages of each:
This type of technology converts the raw data provided by the transducer into user-friendly fish icons of various sizes. Some fish finder models may even provide plant icons, rock icons, and more. All you're left to do is locate an environment that looks suitable and cast your line.
While convenient for beginners, Fish-ID technology also has its drawbacks. It's not always accurate in its interpretation of underwater surroundings and doesn't leave you the option to interpret the environment yourself instead.
On the flip side, accessing raw data from your fish finder can offer greater accuracy—but only if you know how to properly interpret it. This is a skill that can take a bit of practice.
In raw form, fish don't appear as little fish-shaped icons; they appear as arches and lines. Sonar bounces off of fish in motion at slightly different rates, which is why a moving fish will appear as a fish arch while a stationary fish (or other floating object) will appear as a line. Fish represented as full arches have likely swum through your entire sonar cone, while fish represented as half arches may have only swum through a portion of it.
The most accurate way to identify the size of a fish is to catch and actually measure it. That being said, the more you practice reading your fish finder, the better you'll get at zeroing in on potentially big fish so that you can land them.
Traditional 2D sonar scans in cones. Sound waves leave the round transducer on the bottom of your boat and expand out the deeper they go, creating a large cone shape. In practice, this means that you may be seeing a fish that's located behind your boat rather than directly under it. Also, keep in mind that 2D sonar readings will be less accurate at deeper depths.
In Fish-ID mode, bigger correlates to bigger. But on arch mode, this isn't always the case. You'll need to consider the length and thickness of the arch as well as its depth when interpreting raw data.
Deep fish or fish that remain in your sonar cone for long periods of time may appear as long arches, even if they're small fish. That being said, thick lines do typically indicate bigger fish more consistently because sound waves bounce off of their more substantial bodies with greater intensity.
Ready to move beyond the basics? Modern fish finders are constantly evolving. Here's a rundown of the latest sonar trends:
While not a separate sonar technology, compressed high-intensity radar pulse sonar (CHIRP sonar, is an improved version of traditional 2D sonar. While traditional sonar relies on a single frequency, CHIRP sonar uses a combination of different sonar frequencies to gather more complete and detailed information and offer improved object separation.
Side scan imaging sends sonar signals outwards from both sides of your boat. Read from top to bottom on your fish finder screen; it is much broader ranging than 2D sonar and can provide a superior overview of the topography and underwater features around your boat. That being said, it can be more challenging to distinguish fish with side imaging, which is why this type of sonar is often used in combination with other fish finders.
360-degree imaging allows you to see everything inside a specific radius of your fish finder's transducer. Readings appear within a circular shape and can provide a comprehensive glimpse of the underwater environment.
Forward facing sonar is the only fish finder technology that allows you to see fish moving in real time (as opposed to seeing where they were a moment or two earlier). The higher accuracy and superior detail inherent in this product are also reflected in its higher price point.
It takes a bit of practice to interpret fish finder data like a pro, so don't get discouraged if you haven't quite mastered it after your first or second fishing excursion. Play with different speeds, mounts, settings, and views to find what works best for you in different situations.
Fish finders provide the opportunity to enhance your own angler knowledge with advanced technology. You may be able to predict the activity and location of fish based on depth and temperature readings alone.
There's no way around it—accurately identifying underwater structures on a fish finder takes time and practice. That being said, applying all the information provided in this post will help you get started with confidence.