The third generation of venerable fishing tech guru Humminbird’s HELIX series is here, and it’s fantastic. Loaded with features, extensive networking capabilities, a gorgeous display and a plethora of options for fishers of all stripes, we’re so excited about all of the finders in this series. The HELIX 9 is no exception; a great compromise between size and functionality, this fish finder is incredible for enthusiast fishers.
| Models | SI+ | DI+ | CHIRP |
|---|---|---|---|
| Frequency | Sonar: 50/83/200/455/800 kHz & 1.2 MHz; CHIRP: 140-200/150-220/180-240 kHz | Sonar: 50/83/200/455/800 kHz & 1.2 MHz; CHIRP: 140-200/150-220/180-240 kHz | Sonar: 50/80/200 kHz; CHIRP: 140-200/150-220/180-240 kHz |
| Transducer | XM 9 HW MSI T | XM 9 HW MDI T | XNT 9 HW T |
| Screen | 256 colour TFT | 256 colour TFT | 256 colour TFT |
| Screen Size | 9" | 9" | 9" |
| Resolution | 1024 x 600 pixels | 1024 x 600 pixels | 1024 x 600 pixels |
| Backlit | Yes | Yes | Yes |
| Imaging | DI: 125 ft (800 kHz), 200 ft (MEGA), 400 ft (455 kHz); SI: 250 ft (800 kHz), 400 ft (MEGA), 800 ft (455 kHz) | DI: 125 ft (800 kHz), 200 ft (MEGA), 400 ft (455 kHz); SI: N/A | N/A |
| GPS | Internal, High-Precision | Internal, High-Precision | Internal, High-Precision |
| Maps Included | Humminbird Basemap | Humminbird Basemap | Humminbird Basemap |
| Max Waypoints | 2,500 (47 routes, 50 tracks/20,000 points) | 2,500 (47 routes, 50 tracks/20,000 points) | 2,500 (47 routes, 50 tracks/20,000 points) |
| Memory Card Slots | 2 Micro SD | 2 Micro SD | 2 Micro SD |
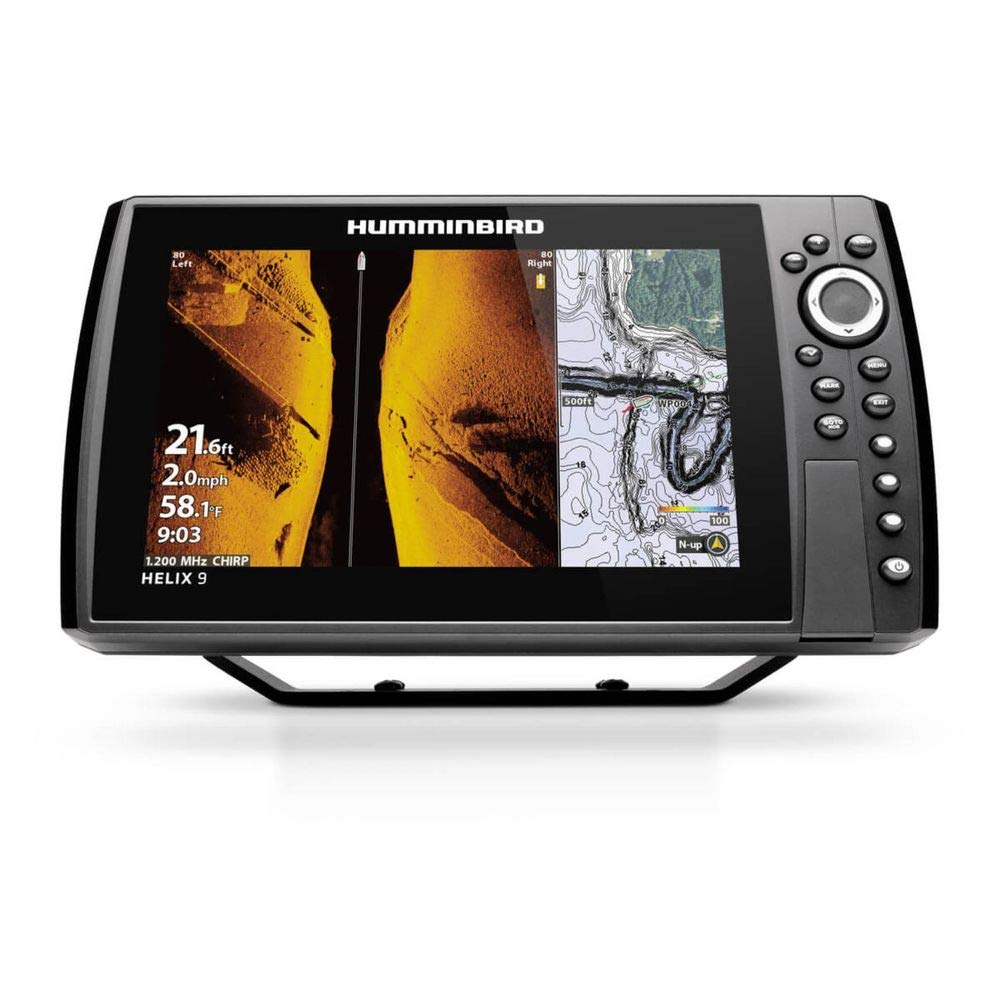
There’s a few things you need in a great fish finder; one of the most important is a great display. After all, you could be getting the best information from the best transducer, but if you can’t read it, it won’t help you catch any fish. Fortunately, your HELIX 9 delivers with a high quality display, no matter which of the three models you choose.
Let’s start by looking at the specs. The HELIX 9 delivers crystal clear images with it’s 1024 x 600 pixel grid and 256 colour TFT. The device is also backlit, which allows you to use it in all kinds of weather; fog or rain, day or night, you can be out on the water catching fish with your HELIX.
The HELIX 9 offers a 9” screen; that gives you a couple of great advantages. The first is that the unit is big enough that you can see a lot of information displayed on the screen, but small enough to fit in setups that wouldn’t accommodate larger HELIX units. That’s a fantastic compromise, because the HELIX 9 still has a lot of the display features you’d look for in a fish finder of this size, like the ability to use split screen views. This allows you to display multiple views simultaneously; you might, for example, have the sonar on the left side and the contour map on the right side.
You can adjust the display so that it perfectly suits your needs. When you’re fishing at dawn or dusk, you can adjust the brightness to reduce glare. You can also up the contrast so you can make it easier to tell the difference between strong and weak readouts. You can change the display colour, you can zoom in and out - basically, you can customize this to suit your environment.
The interface is easy to use; a keypad with arrows and shortcuts. You can program split screen views that you use a lot into the shortcut keys, so it’s easy to toggle between your favorites. The keypad lets you navigate through the menus; the unit is really powerful, so there’s a lot of options. It will take some getting used to, but once you’ve learned to navigate, it’s pretty intuitive.
There’s no touchscreen on that model; whether or not that’s a good thing or a bad thing depends a lot on your perspective. On the one hand, touchscreens allow you to navigate menus more easily; on the other hand, touchscreens and water don’t mix, and a touchscreen only build can cause a lot of problems. A hybrid, like Garmin’s ECHOMAP Plus touchscreen + keypad might be a nice solution, but it’s not that serious a knock against the HELIX.
Your transducer is one of the most important pieces of technology in your fish finding setup, and it’s only as good as the sonar it provides. A brief refresher on how sonar works is helpful for understanding what makes the HELIX 9 so great. With normal sonar, a frequency is sent out of the transducer; it bounces off of objects and comes back to the transducer, which then interprets, along with your fish finder, what the objects it bounced off of are.
CHIRP (Compressed High-Intensity Radiated Pulse) sonar works a bit differently. Instead of transmitting at just one frequency, it transmits at multiple frequencies; this provides you with a couple of great advantages. The first is clarity; the variance in frequencies makes it easier for you to differentiate between targets. CHIRP also provides better depth penetration than sonar operating at one frequency in the same range. You also get a better signal to noise ratio, so the information you’re getting is more accurate.
CHIRP was available in the Gen 2 HELIX devices, but the Gen 3 models have even better CHIRP technology with Dual Spectrum Chirp. Without getting too deep into the technical details, the Gen 3 sends out a greater range of frequencies in less time. Transducers can’t send out and receive frequencies at the same time, but the Gen 3 takes less time to send out pings, so you’re getting information back more rapidly.
All models of the HELIX 9 have 3 CHIRP Sonar modes you can use; wide mode, full mode, and narrow mode.
Wide mode (140-200 kHz) offers the greatest range and depth penetration of the three options, owing to its lower frequencies. Here’s something you’ve got to know about sonar: the lower the frequency, the lower the accuracy. That means wide mode is great for scouting, but when it comes to precision, you’ll be looking for our next mode.
Narrow mode (180-240 kHz) is a great feature of the NEXUS 9 for those looking to do precision fishing with their sonar; while it gives you less range than wide mode, you’ll get clearer readouts, which means better fishing.
Full mode (150-220 kHz) is a compromise between the two modes we just talked about; a bit more precise than wide, a bit more range than narrow. It offers the widest frequency range of the three options.
The third-generation HELIX series offers some incredible mapping options, and the HELIX 9 is no exception. The high precision, internal GPS is extraordinarily accurate, so you’ll always know exactly where you’re fishing. You can use the HELIX 9 to set a ton of waypoints and routes; more than enough for most fishers. You can even share your routes with your friends or between devices, so you’ll be able to show each other the best fishing spots on your favorite lakes.
I think it’s fair to say that most fishers are adventurers, looking to chart their own paths and enjoy the rugged wilderness. One of my favorite HELIX 9 features is AutoChart Live, a technology that makes the most of the marriage between fish finder and GPS. AutoChart uses your transducer to establish the depth contours and other features, like vegetation and bottom hardness, of your surroundings. Coupled with your GPS, this creates a complete underwater map of the area you’re in; you can save that map, share it with your friends, and come back to it again and again. It’s the closest you’ll come to being an underwater cartographer, and it’s really fun to use.
When you first get out on the water, you won’t have maps you’ve charted yourself, but that’s okay; the HELIX 9 comes with the Humminbird Basemap. The Basemap comes with over 10000 U.S. Inland Lakes, and a complete U.S. Coastal Map, so if you’re fishing in the States, you’ll probably be covered. Their LakeMaster series has a number of other maps for purchase that are being constantly updated. Couple those with the maps you can swap with friends who’ve used AutoChart Live, and you can get maps for even the most remote regions.
You might find all this mapping power isn’t enough for you; you want to be able to find the best fishing spots when accounting for the time of day, or the time of season, or the weather. SmartStrike is for you. This technology doesn’t come with the HELIX 9, but it is compatible; basically, you punch in any number of variables, and the technology tells you where fish are most likely to be. Very cool!
There’s a few other pretty nifty mapping features that I want to talk to you about, but they’re all add-ons; add-ons that you can get using the HELIX 9’s powerful networking functionality.
A lot of fishers have been asking for more integrated networking in their fish finders for a long time. The Gen 2 HELIX models would have networking for an extra fee; the Gen 3s come with networking standard.
We’ve already talked about how you can connect two fish finders together; you can also connect your PC or laptop. There are a few other devices you can connect with, like radar, to give you unparalleled awareness of your surroundings. You can link multiple fish finders to the same transducer, which saves you money (you won’t have to buy multiple transducers); you can then use each finder for a particular function.
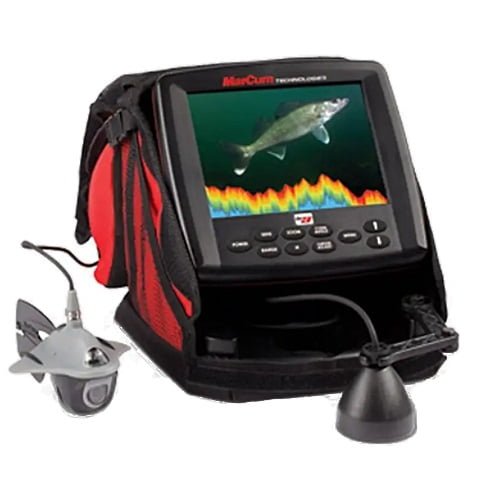
There’s a couple of other devices created by Humminbird that you can link with the HELIX 9; the more devices you link, the more clear a picture of the water you’ll get. One of these devices is 360 Imaging; instead of just getting a side and down view, you’ll get a view of the area all around your boat.
You’re out on the water, and no one really feels like navigating; maybe you’re on your second day of fishing after a long first day, and the lazy, sunny vibes have everyone relaxed. That’s where the Minn Kota i-Pilot can come in handy; basically, you point to where you want to go on your HELIX 9, and your boat will move itself to where you want to go. No guesswork, just good fishing.
Imaging software is probably the coolest technology you can find on fish finders, and if you get an imaging HELIX 9, you’re going to be thrilled. The CHIRP model is fine for people who just want sonar, but seriously, imaging is the next level of fish finding, and I seriously think it’s worth the extra investment.
You remember how we talked about sonar frequencies, and how the higher the frequency, the better the accuracy? Well sonar today is so accurate, it can translate to crystal clear images that almost look like a video of what’s happening under the water. This imaging is available on the Down Imaging+ and Side Imaging+ models of the HELIX 9.
MEGA+ Imaging uses frequencies in the mHz range; the Gen 2 MEGA models had a downwards range of 125 ft, and a side range of 250 ft (125 ft per side). New technology means the Gen 3 models have MEGA+, which has a range of 200 ft down and 200 ft per side, a total of 400 ft of side imaging range.
For those of you who haven’t used Down or Side Imaging, take a look at the MEGA Imaging video on this page; the clarity is really startling. The Down Imaging+ model only comes with Down Imaging; the Side Imaging+ model comes with both Down and Side Imaging.
MEGA+ will give you the most accuracy, but you don’t need to use mHz to get imaging; the models also allow you to use lower frequencies. Why? You know the answer if you’ve been paying attention; wider range and depth penetration! Using 455 kHz will give you 400 feet of Down Imaging, and 800 feet of Side Imaging (400 feet on each side); more than enough to find even the most elusive fish.
Side Imaging+ unlocks a pretty nifty mapping tool; you can overlay your side imaging onto the AutoChart Live maps that you make, giving you a more complete picture of the environment.
There’s a ton of nifty features on this device, and I’m going to go over a few of our favorites. The first is SwitchFire technology, which helps you eliminate signal noise in shallow water, or when you want to more easily distinguish between weak and strong signals. There’s two modes; MaxMode, where your sonar will bring back everything it’s reading, is great for finding details like thermoclines and water currents. ClearMode, on the other hand, eliminates weak signals, showing you only structure and big fish. You can easily switch between the two modes, because it doesn’t change what the transducer is doing - the only thing that’s changing is what is being displayed on your HELIX 9. This is perfect for areas with rapid changes between shallow and deep water; a push of a button, and you’ve changed modes.
Another cool feature is the jigging mode. The Side Imaging features is great for a lot of things, but catching the erratic, rapid movement of a jig isn’t it’s forte. When you switch on the jigging mode, the 2D sonar readout becomes stronger, at the expense of some of the clarity of the Side Imaging; that way, you get a good compromise between both.
This is a really good fish finder! You’re going to be able to fit it in a lot of different boats, it comes jam-packed with features, the display looks amazing, and you can use it day or night. The networking features mean it only gets better as you add more devices to your setup, and the sonar is top-of-the-line. There’s a lot to love about the HELIX 9, and we can’t recommend it enough to enthusiast fishers who want next level technology on their boat.
To confirm that the control head of the HELIX Series has GPS reception, follow these two steps:
To use and navigate the menu system of the HELIX Series control head, follow these guidelines:
By adjusting the User Mode and familiarizing yourself with the navigation controls, you can effectively use the menu system to customize and control your HELIX Series device's settings and functionalities.
To customize and use sonar views on the HELIX Series control head, follow these steps:
To set up and use the chartplotter functions on your HELIX Series control head, follow these steps:
Remember, these are the basic steps for setting up and using the chartplotter. For more detailed instructions and advanced features, refer to the relevant sections in the HELIX Series Operations Manual.
To interpret and customize the display readouts on the HELIX Series control head, follow these instructions:
To utilize and interpret Side and Down Imaging on the HELIX Series control head, follow these instructions:
Additionally, the manual provides several other troubleshooting tips such as: